Industries such as automobiles and construction machinery widely use active worm gears as core components of transmission systems.
The threaded ends of these gears play a critical role in power transmission and load-bearing capacity.
In production, thread breakage, jamming, and nut loosening often occur at threaded ends, reducing product quality and reliability.
Therefore, researching and improving the thread processing technology for active worm gears holds significant practical and engineering application value.
Problem Analysis
Thread End Failure Phenomena
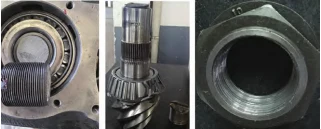
A certain medium-sized bridge worm gear produced by Jiangsu Feichuan Co., Ltd. exhibited thread end fractures during customer assembly, as shown in Figure 1.
This phenomenon not only led to product returns but also severely damaged the company’s reputation.
The engineers conducted a detailed inspection and analysis of the failed components to identify the cause and resolve the issue.
Technical Requirements and Production Process Route
Technical Requirements
The active screw bevel gear thread has the following main technical requirements.
- There must be no micro-cracks at the thread, thread termination, R radius, etc.
These areas are critical stress concentration zones in threaded connections, so it is essential to ensure there are no micro-cracks.
The presence of micro-cracks accelerates thread wear and fracture, severely affecting the stability and lifespan of the gear system.
- The hardness of the threaded section is 288–596 HV0.3 or 30–55 HRC.
This hardness range ensures the thread has sufficient strength and wear resistance to withstand high torque and loads.
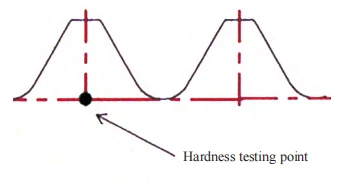
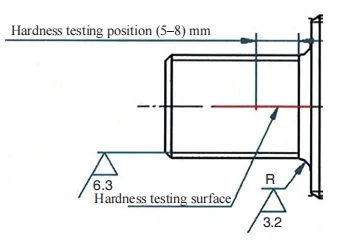
Hardness monitoring points are shown in Figure 2.
- The hardness testing surface, testing location, and surface roughness of the thread are shown in Figure 3.
- The thread must not have any visible defects such as dents, burrs, or broken teeth.
These defects can severely affect the thread’s fit and sealing performance, and may even cause the threaded connection to fail.
Production Process Route
Threaded end process: Ø35 mm machining → pre-heat threading → penetrant → carburizing, quenching, tempering → removal → inspection → finished product.
Failure part inspection
Hardness testing
Hardness of the threaded end 5–8 mm from the shaft neck (right to left) was tested; results are in Table 1.
As shown in the table, the hardness of certain areas of the threaded end exceeds the design requirements, with high hardness points present.
Inspection of other parts of the threaded end also revealed isolated areas where hardness exceeded 560 HV (50 HRC).
Metallographic Examination
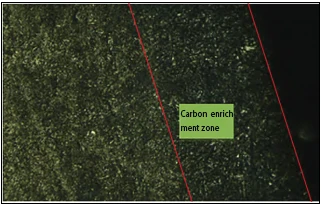
Metallography shows carbon enrichment in the threads (Fig. 4) while the core remains normal (Fig. 5).
Carbon enrichment causes excessive hardness in the threaded area, increasing brittleness and fracture risk.

Compared with the threaded section, the core remains unaffected by carbon enrichment, retaining its original properties and microstructure.
The core’s normal state underscores the abnormal carbon enrichment in the threaded section and its adverse effect on material performance.
Transition Zone Inspection
The hardness test results for the transition zone from the end of the thread to the shoulder are shown in Table 2.
The transition zone hardness (60–61 HRC) is significantly higher than the threaded section, showing a clear difference.
Under load, the harder transition zone resists deformation, while the softer threaded section deforms, causing stress concentration.
Fracture Surface Inspection
As shown in Figure 6, spectrum processing: no peaks were ignored;
processing options: all analyzed elements (normalized); repetition count = 5.
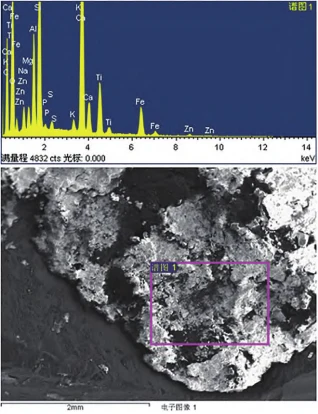
The fracture surface examination results indicate that the fracture is a fatigue fracture with no inclusions.
This suggests that the fracture at the threaded end is due to fatigue damage caused by prolonged exposure to alternating loads.
The absence of inclusions in the fracture surface further supports the conclusion of fatigue fracture.
Visual Inspection
Visual inspection showed intermittent flanges on the chamfer, thread surface damage, and wear on the nut’s internal threads.
Flange formation changes the threaded end shape, potentially causing interference or uneven clearance and affecting fit tightness.
Additionally, flanges may increase assembly difficulty and even cause thread damage.
Scratches reduce thread integrity and contact area, weakening load capacity and sealing.
Under dynamic loads, scratched areas may become stress concentration points, accelerating thread fatigue damage.
Wear reduces thread mating precision and load-bearing capacity, leading to thread loosening or leakage.
In extreme cases, wear may cause complete thread failure, leading to safety incidents.
These issues may all affect the thread’s fit tightness and service life.
Process Inspection
Through process inspection, the primary causes of thread end failure were identified as follows:
Cracking of the anti-seepage agent leads to high-hardness points and carbon-enriched zones in the thread.
After the anti-seepage agent cracks, it may form an uneven hardened layer on the thread surface, resulting in uneven hardness distribution.
High points and carbon enrichment zones alter the stress distribution of the thread, increasing the risk of stress concentration.
Under load, these areas are more prone to plastic deformation, crack initiation, and propagation, ultimately leading to thread failure.
The hardness of the transition zone is higher than that of the thread area, making it prone to stress concentration.
Hardness differences can cause stress concentration at the interface between the transition zone and the thread zone.
Under prolonged loading, stress concentration zones are prone to fatigue damage, leading to thread loosening or fracture.


The threaded end’s flange hinders nut installation/removal, causes misalignment, and reduces component fit.
The flange alters the geometric shape of the threaded end, increasing assembly difficulty.
A misaligned nut does not fit tightly with the thread, reducing the reliability and sealing performance of the connection.
Under vibrational or impact loads, the connection may loosen or even cause thread damage.
Optimization Measures
Improving the Surface Quality of Threaded Ends
Scratch Issues
Customize different types of rubber protective sleeves based on the outer diameter and structure of the threaded ends.
Rubber protective sleeves are typically made from high-strength, corrosion-resistant materials such as nylon and polypropylene.
Determine the rubber sleeve’s inner diameter based on the threaded end’s outer diameter to ensure a snug, protective fit.
Design the rubber sleeve’s shape and size based on the threaded end’s length, pitch, and profile to meet its structural requirements.
The rubber protective sleeve is installed from the first post-threading process until it reaches the customer’s production site.
A 100% inspection is conducted before shipment to ensure the threaded end is free from damage.
Flanging Issue
Flanging occurs at the threaded end during pre-heat treatment machining (as shown in Figure 7), and the flanging persists after heat treatment.
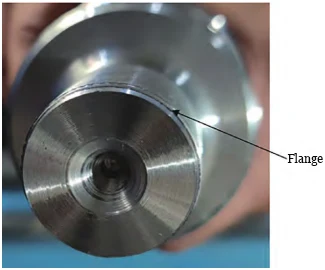
Manufacturing process improvements: The 2×45° chamfer at the threaded end remains unchanged, with an additional 1×¢31.5 step added.
This removes the flange at the end and, when the nut is screwed in, the 1×¢31.5 step serves as a guide.
Inspection process improvements: Add thread ring gauge inspection. If the ring gauge passes, it is deemed合格 and released.
Optimization of performance indicators for threaded sections, transition zones, and spline sections
Optimization of manufacturing processes
Three processes were added after ‘removal of anti-seepage coating’ to enhance the threaded sections’ mechanical properties.
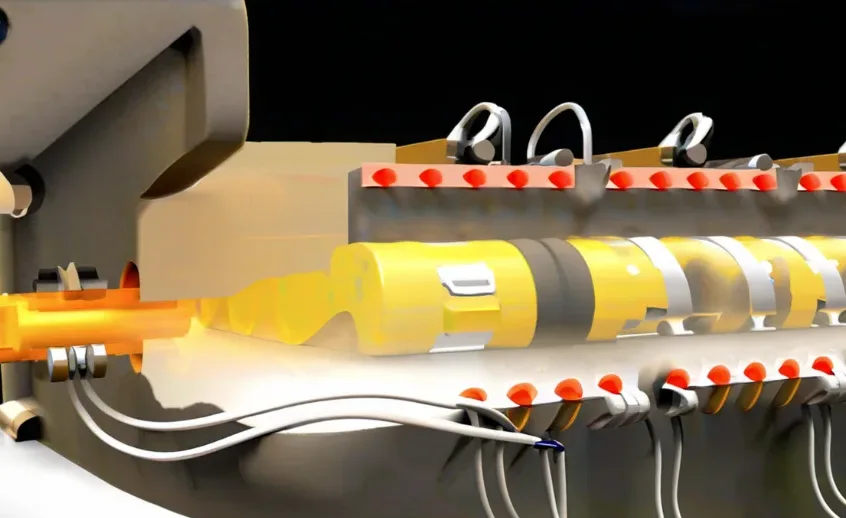
- Induction annealing: Multi-coil heating for 140 s, covering the threaded, transition, and spline areas up to 3 cm above the transition zone.
- Stress-relief annealing: Active worm gear is annealed at 145°C for 120 minutes after induction heating.
- Aging treatment for 48 hours.
Optimization of Inspection Processes
- Scheme Optimization
Original scheme: inspect one threaded section; optimized: inspect three sections—the threaded, transition, and spline (3 cm above transition) areas.
As the primary load-bearing component of the connection, the strength and hardness of the threaded section are critical.
The original scheme already covered this critical area.
The transition zone, linking thread and spline, critically affects connection reliability and durability.
Including it in the inspection scope helps identify potential stress concentrations and fatigue damage.
The spline transmits torque and axial force, with hardness and wear resistance crucial for connection stability and lifespan.
The optimized plan includes it in the inspection scope, helping to ensure the reliability and durability of the spline area.
Optimized inspection covers critical and high-risk areas, improving connection reliability and durability.
- Hardness Optimization
Threaded areas: 320-440 HV0.3 or 34-44 HRC.
This moderate hardness range meets load-bearing requirements while maintaining sufficient toughness to prevent brittle fracture.
Transition zone: 400–575 HV0.3 (42–54 HRC), higher hardness reduces stress concentration and fatigue, enhancing connection durability.
Spline area: 544–635 HV0.3 (52–57 HRC), highest hardness for torque and axial force resistance.
Conclusions
This paper improves drive worm gear thread processing to address fractures, jamming, and nut loosening.
Thread protection sleeves, guide steps, and optimized processing with technical requirements have significantly improved thread-end quality.
Optimized worm gear threads show improved appearance, hardness, and stress, enhancing reliability and service life.
This study provides valuable references and insights for process improvements in similar products.


