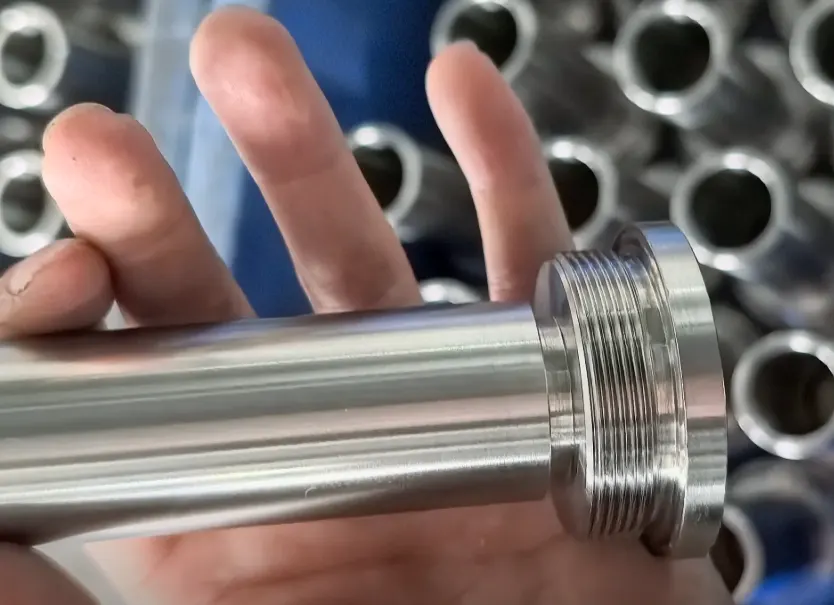
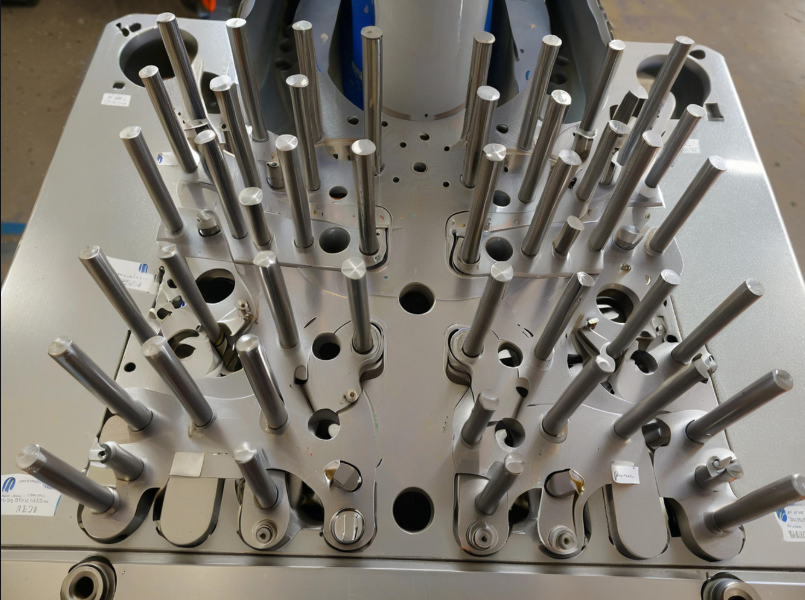
With the progress of technology, the manufacturing industry’s requirements for machining efficiency and product quality continue to improve.
As a result, high-speed cutting technology is facing serious challenges.
Optimizing the high-speed cutting process and improving equipment performance can not only effectively reduce production costs.
It can also enhance machining accuracy and surface quality.
At present, high-speed cutting processing has made some progress in research.
However, researchers still face the technical challenge of further improving cutting efficiency and equipment performance while guaranteeing machining stability.
The study of key factors in the high-speed cutting process is of great practical significance.
It plays an important role in promoting the progress of manufacturing technology.
Experimental preparation and experimental process
Selection of experimental equipment and cutting tools
This study selected the XYZ-1000 high-precision CNC lathe as the experimental equipment.
It has a high dynamic response capability and a precise positioning control system, which effectively guarantees machining accuracy and stability during the high-speed cutting process.
The machine is equipped with high rigidity spindle and stable drive system, which is suitable for high-speed cutting of many complex workpieces.
“To ensure the accuracy of cutting force and cutting temperature measurements during the experiment, the manufacturer equipped the machine tool with force sensors.
The manufacturer also equipped it with thermocouple sensors to monitor temperature changes.
These sensors enable real-time monitoring of cutting force and temperature changes during the cutting process.
The cutting tool is a polycrystalline diamond tool, which has excellent hardness, wear resistance, and thermal stability.
These properties allow it to meet the requirements of cutting force, surface quality, and tool life in the high-speed cutting process.
Material and size selection of the experimental workpiece
The researchers selected high-strength aluminum alloy (7050 aluminum alloy) for the experiment, which industries widely use in aerospace and automotive applications.
It also has good mechanical properties, corrosion resistance, and processing performance.
7050 aluminum alloy has high strength and moderate cutting performance, is one of the typical materials in high-speed cutting processing.
The chemical composition of this material mainly includes aluminum, zinc, copper and magnesium, with high tensile strength and good plasticity.
The size of the workpiece selected in the experiment is a cylindrical aluminum alloy workpiece with a diameter of 80 mm and a length of 150 mm.
To study the influence of different cutting conditions on machining performance, the surface of the workpiece is pretreated.
This ensures that the surface finish and dimensional accuracy meet the experimental requirements.
Aluminum alloy has a density of about 2.81 g/cm³ and a Young’s modulus of 70 Pa.
These properties contribute to its high machining efficiency and low cutting resistance in high-speed cutting.
Experimental Parameters and Method Design
To study the influence of high-speed cutting process parameters on machining performance, the article designed a series of experiments.
These experiments regulate process parameters such as cutting speed, feed, and depth of cut, and analyze their impact on the machining results.
In the experiment, the cutting speed was set to 400 m/min, 600 m/min, 800 m/min, and 1,000 m/min.
This was done to study the effect of different cutting speeds on the surface quality of the workpiece and cutting force.
The feed was set to 0.1 mm/r, 0.2 mm/r, 0.3 mm/r to analyze the effect of the change of feed on the cutting temperature and machining accuracy;
The depth of cutting was set to 1 mm, 2 mm, 2 mm and 2 mm respectively.
The cutting depth was set to 1 mm, 2 mm and 3 mm, respectively, to study the effects on cutting force, surface roughness and tool wear.
Each set of experiments was repeated three times to improve the accuracy and reliability of the experimental data.
The main parameters of the experiments include cutting speed, feed and depth of cut, etc.
Experiment Analysis and Control Measures
The experiments will be analyzed based on the direct effect of these parameters on the machining results.
The data will then be statistically analyzed to identify the optimal combination of process parameters.
The experiment also pays special attention to the use of coolant in order to study the effect of coolant on cutting temperature and surface quality.
To improve the comparability of the experiments and the accuracy of the data, all the experiments were conducted at a constant ambient temperature.
Additionally, tools of the same type and size were used throughout the experiments.
Experimental results
Effect of cutting speed on machining quality
In the process of high-speed cutting, cutting speed has a significant effect on machining quality indicators such as surface quality, cutting force and cutting temperature.
The experiment shows that with the increase of cutting speed, the cutting force shows obvious non-linear changes.
Higher cutting speed leads to an increase in cutting heat, which in turn increases the surface temperature of the workpiece and affects the surface quality.
In particular, the surface roughness increases significantly at higher cutting speeds.
Experimental data show that when the cutting speed increases from 400 m/min to 1 000 m/min, the surface roughness increases by about 30%.
Although increasing the cutting speed can improve machining efficiency, too high a cutting speed leads to the accumulation of cutting heat and an increase in cutting force.
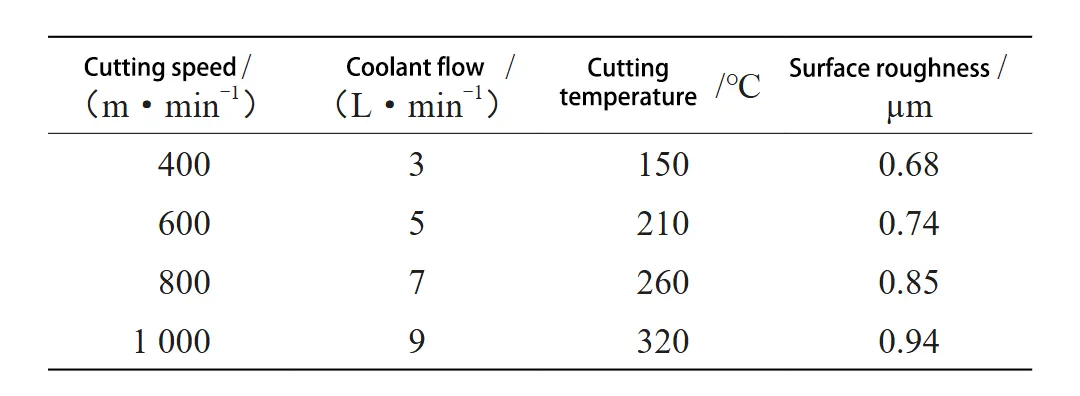
This accelerates tool wear and deteriorates the surface quality of the workpiece. The effect of cutting speed on surface roughness is shown in Table 1.

From Table 1, it can be seen that with the increase of cutting speed and feed, the surface roughness shows an increasing trend.
The surface roughness increases from 0.68 μm to 0.94 μm when the cutting speed increases from 400 m/min to 1,000 m/min.
The data show that higher cutting speed directly affects the surface quality, which is mainly manifested in the increase of surface roughness.
Influence of feed on machining quality
Feed is one of the important parameters affecting machining quality. The experimental results show that the surface roughness increases significantly with the increase of feed.
Under the condition of higher feed, the surface roughness is larger, and the cutting temperature also increases significantly.
The experimental data show that the surface roughness reaches its maximum value at a feed rate of 0.4 mm/r, while it is lower at a feed rate of 0.1 mm/r.
The effect of feed on surface roughness and cutting temperature is shown in Table 2.

An increase in feed is usually accompanied by a rise in cutting temperature.
Higher cutting temperatures tend to increase tool wear and the rounding of the cutting edge, which significantly shortens tool life.
At high feed rates, accelerated tool wear leads to a decrease in machining accuracy.
At the same time, surface quality may be impaired, particularly with an increase in surface roughness.
Therefore, in the actual machining process, the reasonable selection of feed rate is crucial.
It plays a significant role in extending tool life and improving machining quality.
As shown in Table 2, the surface roughness and cutting temperature show an increasing trend with the increase of feed rate.
At a feed rate of 0.4 mm/r, the surface roughness reaches 0.94 μm and the cutting temperature rises to 320 ℃.
The data show that the higher feed directly leads to the deterioration of surface quality and the increase of cutting temperature, which affects the machining accuracy and tool life.
The effect of depth of cut on machining quality
To systematically analyze the effect of depth of cut on machining quality, the experiment was designed with different depth of cut conditions.
This allowed for observing the changes in cutting force, cutting temperature, and surface roughness.
The experimental results show that with the increase in depth of cut, both the cutting force and cutting temperature exhibit an increasing trend.
Similarly, the surface roughness also shows an upward trend.
This indicates that a larger depth of cut directly leads to an increase in cutting force and cutting temperature, which in turn affects the surface quality of the workpiece.
The results of the data analysis show that as the depth of cut increases, the cutting temperature also rises.
This is especially true at larger depths of cut, where the cutting temperature sometimes exceeds 250°C, significantly increasing surface roughness and tool wear.
Therefore, controlling the depth of cut is the key to maintaining machining quality and extending tool life. The relationship between depth of cut and surface roughness is shown in Table 3.

From Table 3, it can be seen that with the increase of depth of cut, the cutting force, cutting temperature and surface roughness all show an increasing trend.
When the depth of cut increases from 1 mm to 3 mm, the surface roughness increases from 0.68 μm to 0.85 μm.
This indicates that an increase in depth of cut directly leads to the deterioration of surface quality.
At larger depths of cut, the rise in cutting temperature has a significant impact on the machining effect.
High-speed cutting process parameters optimization points
High cutting speed can improve machining efficiency. However, if the cutting speed is too high, it will lead to higher cutting temperatures, which in turn affect surface quality, increase tool wear, and shorten tool life.
A reasonable choice of cutting speed is key to improving productivity and processing quality.
A cutting speed range of 600 to 800 m/min shows relatively smooth changes in surface roughness and cutting force, indicating that this range is suitable for most machining tasks.
Higher feed rates help increase productivity. However, if the feed is too high, it can lead to a significant increase in cutting forces and temperatures, which affects machining stability and surface quality.
At a feed rate of 0.2 to 0.3 mm/r, the cutting force is relatively small and the surface quality is good, which is suitable for efficient machining.
The effect of depth of cut on machining performance is more complex. A larger depth of cut increases cutting force, generating greater cutting heat, which can accelerate tool wear.
However, if the depth of cut is too small, it may not allow the tool to reach its full potential, resulting in a decline in efficiency.
Theoretical and Experimental Insights for Optimization
Comprehensive analysis of cutting speed, feed and depth of cut, optimize these process parameters can significantly improve the processing quality and productivity.
According to the experimental data, the cutting speed is controlled at 600-800 m/min, and the feed is controlled at 0.2-0.3 mm/r.
Additionally, the depth of cut is controlled at 1-2 mm to achieve better machining results.
The core of process parameter optimization is to establish a dynamic equilibrium model between cutting force, temperature and material removal rate.
From the perspective of energy dissipation, the matching of cutting speed and feed needs to meet the optimal solution of energy distribution:
Too high a cutting speed can improve the material removal rate.
However, it will lead to excessive conversion of cutting energy into heat, disrupting the thermal balance at the tool-workpiece interface.
The selection of feed needs to consider the effect of chip thickness on the shear angle.
If the feed is too large, it will increase the concentration of stress on the shear surface, which can induce cutting vibration.
The optimization of cutting depth should be combined with the theory of fracture mechanics.
This approach helps avoid the expansion of subsurface cracks triggered by an excessive cutting layer thickness.
For example, in the finishing stage, a small depth of cut can enhance surface integrity by reducing the residual stress gradient through lowering the main cutting force component.
This multi-parameter co-optimization is essentially a control strategy based on system stability.
To implement it effectively, the coupling mechanism of each parameter needs to be clarified through theoretical modeling.
Impact of equipment performance improvement on machining effect
The XYZ-1000 CNC lathe adopts a double-wall box bed structure, which improves its damping characteristics by 30% compared to the traditional single-wall structure.
At a cutting speed of 800 m/min, the measured vibration acceleration decreased from 5.2 m/s² to 3.6 m/s².
- This unit adopts ceramic hybrid bearings and hydraulic pretensioning technology, the axial stiffness is increased to 1 800 N/μm, the radial runout is controlled to 3.6 m/s2.
- The spindle unit adopts ceramic hybrid bearings and hydraulic preload technology, the axial stiffness is increased to 1 800 N/μm, and the radial runout is controlled to 4.0 mm.
- Spindle group adopts ceramic hybrid bearings and hydraulic preload technology to increase the axial stiffness to 1,800 N/μm, and the radial runout is controlled below 2 μm.
Experimental data show that the temperature rise of the spindle is only 8 ℃ after 4 hours of continuous machining, which is 45% lower than that of the traditional steel bearing spindle.
This significantly reduces the impact of thermal deformation on machining accuracy and provides a hardware basis for the optimization of process parameters.
Automation, Monitoring, and Process Optimization
The XYZ-1000 CNC lathe used in this study features high rigidity and low thermal deformation capacity.
This enables the machine to maintain good machining accuracy and low cutting force fluctuations during the high-speed cutting process.
The high rigidity and high precision servo system of the machine tool can effectively suppress the vibration generated during the cutting process.
This helps reduce machining errors and ensures the dimensional accuracy and surface quality of the workpiece.
The cooling system and temperature control technology of the machine tool play an important role in the high-speed cutting process.
The improvement in the degree of automation and intelligence of the equipment allows real-time adjustment of process parameters.
This ensures that the machining process remains in an optimal state at all times.
The intelligent monitoring system of the machine tool can monitor cutting force, temperature, vibration, and other key parameters in real time.
Based on the data feedback, it adjusts the processing parameters to avoid overloading, overheating, and other undesirable situations, thereby optimizing the processing effect.
Conclusion
The experimental results show that a reasonable choice of cutting speed, feed, and depth of cut can effectively improve machining quality.
It can also reduce cutting force and temperature, while enhancing surface roughness.
Cutting tool wear is closely related to cutting force and temperature, optimizing cutting process can extend tool life and improve machining efficiency.
Enhancing the performance of the equipment helps ensure machining accuracy and cutting stability.
This serves as both a theoretical foundation and a practical guide for further improving the overall performance of high-speed cutting and machining.
As a result, it plays a significant role in promoting technological advancement in related fields.
FAQ:
High-speed cutting (HSC) is an advanced machining technique that uses extremely high cutting speeds, optimized feeds, and precise tool control to improve machining efficiency, surface quality, and dimensional accuracy. It is widely applied in aerospace, automotive, and precision engineering industries.
High-speed cutting technology helps manufacturers achieve higher efficiency, reduced production costs, and improved product quality. By optimizing cutting parameters, HSC ensures better surface finishes, less tool wear, and enhanced machining stability, meeting the growing demands of advanced industries.
The main parameters influencing high-speed cutting include cutting speed, feed rate, and depth of cut. These factors directly impact machining quality, cutting force, surface roughness, temperature, and tool life. Optimizing these parameters is crucial for stable and efficient machining.
Cutting speed plays a critical role in machining accuracy and surface finish. While higher cutting speeds increase productivity, they also generate more cutting heat, leading to tool wear and higher surface roughness. Optimal cutting speeds (600–800 m/min) balance efficiency and surface quality.
Increasing the feed rate improves material removal efficiency but also raises cutting force and temperature. Excessive feed can accelerate tool wear, reduce machining accuracy, and degrade surface quality. A moderate feed rate (0.2–0.3 mm/r) offers the best balance between productivity and precision.
A larger depth of cut increases cutting force, temperature, and surface roughness, which can cause tool wear and machining instability. However, too shallow a cut reduces efficiency. Maintaining a depth of cut between 1–2 mm is ideal for balancing tool performance and surface integrity.
High-strength aluminum alloys, such as 7050 aluminum alloy, are commonly used in high-speed cutting experiments. They are widely applied in aerospace and automotive manufacturing due to their excellent strength, corrosion resistance, and favorable machinability.
The performance of CNC machines, such as rigidity, spindle stability, and thermal control, significantly influences cutting accuracy and surface quality. For example, advanced machines like the XYZ-1000 CNC lathe reduce vibration, thermal deformation, and cutting force fluctuations for stable machining.
Coolants and temperature control systems are essential for dissipating cutting heat, reducing tool wear, and maintaining surface integrity. Real-time temperature monitoring helps optimize machining conditions and extend tool life, especially under high-speed operations.
Manufacturers can optimize high-speed cutting by carefully balancing cutting speed (600–800 m/min), feed rate (0.2–0.3 mm/r), and depth of cut (1–2 mm). Combining this with advanced CNC equipment, intelligent monitoring systems, and effective cooling ensures maximum efficiency, stability, and product quality.


